Pages

Friday, 30 November 2012

ANZAC Biscuits


Afternoon Everyone!

Here's a little story for you:

Once there was a war.  A terrible war. It was called World War 1.  There were wives and mothers who were worried about about their men who were fighting in the war and what they were eating... as mothers and wives do.  Enter the ANZAC (Australian and New Zealand Army Corps) biscuit.  Nutritional and would keep while been sent overseas to the front line.  These biscuits are sweet and caramelly with rolled oats (to keep you feeling full for longer).

Nowadays we still love our Anzac bikkies and eat them all year round.  Here is the recipe:


ANZAC Biscuits

1 cup coconut
1 cup sugar
1 cup rolled oats
1 cup plain flour 
Pinch of salt
1 tablespoon golden syrup
4 tablespoons margarine
2 tablespoons boiling water
1 teaspoon bi-carb soda

Mix together all of the dry ingredients (coconut, sugar, rolled oats, flour and salt).
Melt the golden syrup and margarine together in the microwave.
Mix together the boiling water and bi-carb soda. 
Add to the golden syrup and margarine and then add to the dry ingredients.
Bake at 180°C for 15-20 mins or until golden brown.

I Love PicMonkey


PicMonkey

Afternoon Everyone!


This is just a quick post to tell you about how much I love PicMonkey.  I have used it to edit all of the photos that I uploaded to this blog.

It is easy to use and so fast.  Simply upload your photo and then click away at all of the options on the sidebar to edit.  It is basically web-based Photoshop style photo editing for dummies.  You can crop, rotate, re-size and sharpen a photo and that's just the basics.  There are also so many effects (my favourite is focal soften) overlays and frames as well as touch up effects that can remove wrinkles, get rid of blemishes and even make your eyes look brighter!  There is also the collage option that I used in my Recycled Bottle Toy post.

And now they have Winter Wonderland effects that can be added to your photos.  Snowfall effects, snowflake overlays, winterscapes for the bottom of the photos ... I'm in heaven!

The address is:

http://www.picmonkey.com/

Check it out!


Tuesday, 6 November 2012

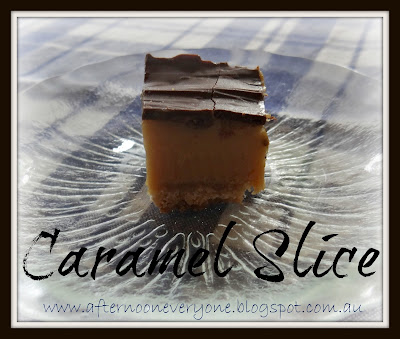
Caramel Slice


Afternoon Everyone!

Isn't it funny that sometimes the best tasting food isn't always the prettiest.  That is the case with this slice. It's sticky and it's hard to cut the chocolate without it cracking but oh my it tastes so good!  This slice has to be the most sickly sweet, straight to the thighs, I really should only have one piece but I can't help but have more kind of treat ever!

I originally found this recipe on Best Recipes and have made it countless times and it has never failed.

Base
1 cup flour
½ cup desiccated coconut
½ cup brown sugar
125g butter, melted

Caramel Filling
½ cup golden syrup
125g butter, melted
2 x 395g cans sweetened condensed milk

Chocolate Topping
185g chocolate
3 teaspoons vegetable oil

Base:
Preheat the oven to 180°C.

Combine flour, coconut, sugar and melted butter.
Press the mixture into a 20cm x 30cm tin lined with baking paper.
Bake for 15 to 20 mins or until golden brown.
Caramel Filling:
Combine syrup, butter and sweetened condensed milk in a saucepan.  Stir over low heat for 7 minutes or until the caramel has thickened a little.
Pour over the base and bake for 20 mins or until the caramel is golden.
Refrigerate until cold.
Chocolate Topping:
Combine chocolate and vegetable oil in a glass bowl.  Melt over a saucepan of boiling water, making sure that the glass bowl doesn't touch the water. 
Spread the melted chocolate over the slice and refrigerate.
Slice and enjoy.

Now, don't forget to share...

Wednesday, 31 October 2012

Strawberry and Passionfruit Cordial

Afternoon Everyone!

Strawberry and Passionfruit Cordial

The hubster loves strawberries and he especially loves strawberry cordial.  To the point where I have a freezer full of strawberries ready to be made into cordial now that the season is about over.  This recipe is very similar to my Pineapple Cordial

To make Strawberry Cordial you will need:
Diced Strawberries (overripe is OK but bland strawberries won't make a very good cordial)
Water
Sugar
Citric Acid
Passionfruit Pulp


Strawberry and Passionfruit Cordial
1. Cover the diced strawberries with water and boil for 30 mins.  Put into the fridge overnight.

Strawberry and Passionfruit Cordial
2. Strain out the strawberry pulp and then rub it through a strainer so that your strawberry liquid has a lot of pulp but no seeds.

Strawberry and Passionfruit Cordial
3. Measure your strawberry liquid.  You will need a cup of sugar for each cup of strawberry liquid.  Mix together in a saucepan.

Strawberry and Passionfruit Cordial
4. Stir the combined sugar and strawberry liquid over low heat until all of the sugar has dissolved.

Strawberry and Passionfruit Cordial
5. Add 1 teaspoon of citric acid for every litre (or every 4 cups) of liquid.  Add passionfruit pulp to taste (I usually add 2 per litre).  Bottle and store in the fridge for up to 2 weeks.  

To make the cordial, mix 1/5 cordial with soda water.

Also, I have noticed that the passionfruit seeds dance when the cordial is mixed with soda water.  The bubbles will make a seed float to the top of the glass and then once the bubbles have popped the seed will fall back down to the bottom again.  Maybe I should have called this drink "The Dance of the Passionfruit Seed" or not....

Friday, 26 October 2012

Recycled Bottle Toy

Afternoon Everyone!


Everyday my little 9 month old girl wants to explore something new.  According to her all of her toys are old news.  But one of her all time favourite toys is an ocean in the bottle that we made at playgroup months ago using dyed water, baby oil and shells.  She can shake it, listen to it rattle, watch the shells and best of all roll it along the floor and crawl after it.  And sometimes because we have uneven floors it even comes rolling back to her.  What fun!

So I decided to make her another one.  A green one with pretty girly things in it.  Not that she really cares how girly it is, just as long as it is interesting.

To make a Recycled Bottle Toy you will need colourful objects that fit in a waterbottle, glitter, food dye, water and baby oil.  I only used baby oil as it is clear.  Vegetable oil will work well too.

Here are the things that I used:
Buttons
Plastic Flowers
Wishing Stones (those melted marble looking things)
Plastic Gems
Plastic Safety Pin Embellishment
Plastic Baby Bottle Embellishments
Pink Star Table Scatters
Gold Glitter
Shells
Organza Fabric (cut into little pieces)


To make the Recycled Bottle Toy:

1. ¾ fill a plastic bottle with water.


2. Add food dye.  I always add too much so I just dipped a skewer into the food dye bottle and then into the water.  I repeated this until I had reached my desired shade of green.


3. Add all of the objects and glitter.


4. Top up with baby oil. Hot glue gun the lid shut so that little hands don't get any of those objects into a little mouth.


And that's it.  A quick and easy to make toy using things from around the home that will keep the little one entertained for oh.. 15 minutes if you're lucky.  But I know that this is a toy that my little girl with keep coming back to, just so that she can discover something new inside.

Plus, the teacher side of me know that this is a good learning tool for discussing floating and sinking.  But I think that discussion with my daughter is a long way away.


Thursday, 18 October 2012

Chevron Painted Flower Pots

Afternoon Everyone!


Plain old boring terracotta pots are out... chevrons are in!  

I needed some colourful pots and I love chevrons at the moment.  But putting a chevron pattern on a round pot was as little harder than I expected.  So this is how I tackled the problem: 


First of all you will need
  • terracotta pot
  • undercoat paint
  • paint brushes
  • ruler 
  • pencil
  • masking tape
  • acrylic paint (assorted colours)
  • varnish

Terracotta pots are so cheap now that they are no longer in fashion.  I got this one from the local hardware store for $3.  The larger one in the above photo was only $10.

Undercoat the pot inside and out.  I used an all in one sealer, primer, undercoat from British Paints.  I needed to do 3 coats before the pot was completely white.  Just remember that you need a totally white pot so the they colours will look their best when painted.  I stopped lining the kitchen table with newspaper at this stage as I found that the print was rubbing off onto the pots and leaving black marks.

Turn the pot upside down and draw a pencil outline just under the lip.  This will be the outline for the black at the top.

Now you will need to crack out your primary school maths formulas.  When doing the chevrons you will need to divide the pot into an even number of sections.  If you choose an odd number of sections your chevrons will not match up.  I choose 6 for the smaller pots and 8 for the larger pot.  The more sections you have the tighter your chevrons will look.

Now to work out the size of each section:

Measure the diameter (that's the entire width) of your pot on the bottom. 
Times it by 3.14 to work out the circumference (that's the distance around the outside)
Divide your answer by the number of sections that you want.
Now you have the distance to be measured around the bottom of the pot for each section.

So the formula would be:
D)÷6

Here is what I did on my little pot:
10.5cm (diameter) x π (3.14)
=32.97cm ÷ 6
=5.495cm
I rounded it to 5.5cm

Using the ruler I measured the base of the pot into 5.5cm sections. 

This process would be easier with a floppy ruler but my hard plastic ruler worked just as well.  I simply rolled it around the base.

 Since the pot is larger at the top than it is at the bottom measuring out the sections needs to be done a little differently.  Once you have divided you pots into 6 equal sections on the base hold the ruler at a right angle against the top of the pot and visually line it up with that mark that you have put on the bottom of the pot.  Put a mark on the top of the pot just under the lip on the outline that you have already drawn.

Place the ruler against the pot (matching up the marks on the top and bottom) and measure out the desired height of the chevrons.  Use a pencil to place the marks.  Mine are 1.5cm high.

Use masking tape to help with the painting of the chevrons.  For my pots I went from the bottom mark in one section to the 3rd bottom mark in the next.

There may be a section at the top of the pot that will need some tape but you  won't have any dots to match the tape up to.  Although the heights have been measured out as 1.5cm high the actual width of the chevrons are slightly smaller.  Use the ruler to measure along the top of the tape at 1.3cm.  Place a few dots and the put the tape along the dots.

Here is a photo of the pot completely taped up.

Paint between the tape.

Carefully pull of the tape.

Paint the white chevrons over the undercoat with acrylic paint.  Although the chevrons are already white, painting them with white acrylic paint will make the pot look more crisp and also some of the pencil marks may need to be painted over.

Paint the inside and out of the lip black.

Varnish the pots inside and out.  This will help to seal the paint and stop it from pealing.  I used an exterior clear in a spray can and did 2 coats.

Here are the other pots that I did before putting some plants in them.

And here they are again.  I planted some herbs in them; lemon thyme, italian parsley and chives.  Now to keep them alive...

Monday, 24 September 2012

Chocolate Mulberry Cupcakes


Chocolate Mulberry Cupcakes

Afternoon Everyone!

Mulberries.  They taste like my childhood.  My grandma had the best mulberry tree ever and I spent a lot of time just sitting under it and eating and eating mulberries until my hands were stained purple.

Now it is my parents who have the tree and have given me heaps of the sweet little morsels.  So I decided to pair them up with chocolate and the combination is just heavenly. 

Glorious TreatsI am quickly discovering that the best recipes on the internet are from other bloggers.  I know that I only put my absolute favourite recipes on here and it is the same for other bloggers.  So I used the recipe for chocolate cupcakes from a blog called Glorious Treats.  The icing is a buttercream that is made using mulberry juice. 

So, here it is: chocolate cupcakes with mulberry juice icing and topped with a sweet little mulberry...


Chocolate Cupcakes
(makes 24-27 standard sized cupcakes)
2 cups sugar
1 3/4 cups plain flour
3/4 cup cocoa
1 1/2 teaspoons baking powder
1 1/2 teaspoons bi-carb soda
1 teaspoon salt
2 eggs
1 cup milk
1/2 cup vegetable oil
1 teaspoons vanilla paste
1 cup boiling water

Line muffin tin with paper liners.  Heat oven to 180°C.  Add eggs, milk, oil and vanilla.  Beat on medium speed for one minute.  Stir in boiling water (the batter will be quite runny).  Fill liners 2/3 full with batter.  Bake cupcakes for approximately 22-24 minutes.  Cool completely on wire rack before icing.

Mulberry Buttercream Icing

1/4 cup butter (57g)
1/2 tub cream cheese (125g)
1/4 cup mulberry juice
3 1/2 - 4 cups icing sugar

Leave butter out until it is at room temperature.  Using electric beaters blend butter and cream cheese in a bowl until well combined.  Add mulberry juice and blend.  Gradually add the icing sugar and beat until the desired consistency is reached.  Using a star tip pipe onto cupcakes.  The buttercream may need to be returned to the fridge so that it pipes well onto the cupcakes without flopping.

Top the cupcake with a mulberry and enjoy!