Pages

Friday, 30 November 2012

ANZAC Biscuits


Afternoon Everyone!

Here's a little story for you:

Once there was a war.  A terrible war. It was called World War 1.  There were wives and mothers who were worried about about their men who were fighting in the war and what they were eating... as mothers and wives do.  Enter the ANZAC (Australian and New Zealand Army Corps) biscuit.  Nutritional and would keep while been sent overseas to the front line.  These biscuits are sweet and caramelly with rolled oats (to keep you feeling full for longer).

Nowadays we still love our Anzac bikkies and eat them all year round.  Here is the recipe:


ANZAC Biscuits

1 cup coconut
1 cup sugar
1 cup rolled oats
1 cup plain flour 
Pinch of salt
1 tablespoon golden syrup
4 tablespoons margarine
2 tablespoons boiling water
1 teaspoon bi-carb soda

Mix together all of the dry ingredients (coconut, sugar, rolled oats, flour and salt).
Melt the golden syrup and margarine together in the microwave.
Mix together the boiling water and bi-carb soda. 
Add to the golden syrup and margarine and then add to the dry ingredients.
Bake at 180°C for 15-20 mins or until golden brown.

I Love PicMonkey


PicMonkey

Afternoon Everyone!


This is just a quick post to tell you about how much I love PicMonkey.  I have used it to edit all of the photos that I uploaded to this blog.

It is easy to use and so fast.  Simply upload your photo and then click away at all of the options on the sidebar to edit.  It is basically web-based Photoshop style photo editing for dummies.  You can crop, rotate, re-size and sharpen a photo and that's just the basics.  There are also so many effects (my favourite is focal soften) overlays and frames as well as touch up effects that can remove wrinkles, get rid of blemishes and even make your eyes look brighter!  There is also the collage option that I used in my Recycled Bottle Toy post.

And now they have Winter Wonderland effects that can be added to your photos.  Snowfall effects, snowflake overlays, winterscapes for the bottom of the photos ... I'm in heaven!

The address is:

http://www.picmonkey.com/

Check it out!


Tuesday, 6 November 2012

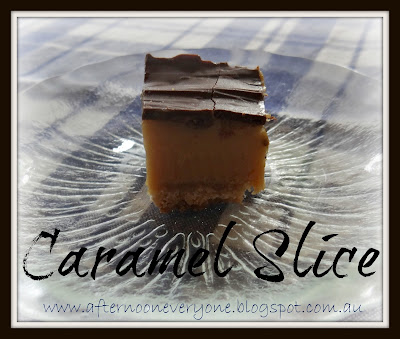
Caramel Slice


Afternoon Everyone!

Isn't it funny that sometimes the best tasting food isn't always the prettiest.  That is the case with this slice. It's sticky and it's hard to cut the chocolate without it cracking but oh my it tastes so good!  This slice has to be the most sickly sweet, straight to the thighs, I really should only have one piece but I can't help but have more kind of treat ever!

I originally found this recipe on Best Recipes and have made it countless times and it has never failed.

Base
1 cup flour
½ cup desiccated coconut
½ cup brown sugar
125g butter, melted

Caramel Filling
½ cup golden syrup
125g butter, melted
2 x 395g cans sweetened condensed milk

Chocolate Topping
185g chocolate
3 teaspoons vegetable oil

Base:
Preheat the oven to 180°C.

Combine flour, coconut, sugar and melted butter.
Press the mixture into a 20cm x 30cm tin lined with baking paper.
Bake for 15 to 20 mins or until golden brown.
Caramel Filling:
Combine syrup, butter and sweetened condensed milk in a saucepan.  Stir over low heat for 7 minutes or until the caramel has thickened a little.
Pour over the base and bake for 20 mins or until the caramel is golden.
Refrigerate until cold.
Chocolate Topping:
Combine chocolate and vegetable oil in a glass bowl.  Melt over a saucepan of boiling water, making sure that the glass bowl doesn't touch the water. 
Spread the melted chocolate over the slice and refrigerate.
Slice and enjoy.

Now, don't forget to share...